

Managing Editor
@ShahidNShah
@ShahidNShah

The extraction is done, the vials are capped and the tray is loaded. Then the first calibrator comes off with a tailing peak and half the response it had last week. Now you’re troubleshooting with patient samples waiting.
Often the cause is a consumable: something worn, expired or swapped for a near match. Ten minutes with the checklist below, before the sequence starts, is cheaper than a repeated batch. Every check comes back to one question: does this match the validated method?
The column is the first check, because every retention time in the batch depends on it. Confirm that the installed column matches the method for stationary phase, length, internal diameter and film thickness. Read the tag on the column cage. Don’t go by memory.
Look at the column log next. How many injections has it seen, and how much has been trimmed from the inlet end? Each trim shortens retention times a little, so check that your retention windows were updated the way your procedure requires.
Run the system suitability check the method calls for and compare it with the last few batches. Rising baseline bleed, broader peaks or drifting retention times point to a column that’s near the end of its life. Replace it between batches, on your schedule, and document the change the way your procedure describes.
The inlet liner is the consumable most likely to cost you a batch, because every sample passes through it. Residue from biological extracts builds up on the glass and the wool, and active analytes start to stick. You see it as tailing peaks and falling response on the compounds that matter most.
Check the liner log against the change interval your lab has set, counted in injections. Dirty matrices shorten that interval. If you’re close to the limit, change the liner before the batch, not halfway through it.
A replacement has to match what was validated. Restek’s listings for a deactivated GC inlet liner, for instance, state each liner’s type, dimensions, wool and the instrument it fits, and those are the details to compare with your method line by line. A different taper or wool position changes how the sample vaporizes, so treat it as a method change and follow your lab’s change control.
Handle the new liner with clean gloves or forceps, seat the O-ring, and run a solvent blank and a check standard before any patient sample.
Septa and seals are small parts that cause big leaks, so inspect them on a schedule. A cored septum drops particles into the liner and lets air into the carrier gas, which shows up as ghost peaks and a noisy baseline.
Check each of these before the run:
Leak-check the inlet after any change. On a mass spectrometer, the air and water signals in the tune report are a quick indicator. Record the result with the maintenance entry.

Reference materials set the accuracy of every result in the batch, so they get the closest look. Calibrators, internal standards and quality control materials each need checking, and each can fail in a different way.
Start with the paperwork. NIST defines a certified reference material as one accompanied by a certificate that gives the property value, its uncertainty and a statement of metrological traceability. Confirm you have that certificate on file for each lot in use, and that the concentration on it matches what’s entered in your calibration table.
Check the expiry date on the stock and on every working solution made from it. A working calibrator has its own, shorter expiry, set by your procedure.
Confirm each material was stored the way its certificate specifies. Look at the freezer or refrigerator log for the period since the last batch. Let solutions reach room temperature before opening them, and mix before you pipette.
A new lot of calibrator or control isn’t ready to use the day it arrives. Verify each new lot against the current one as your procedure requires, and keep the comparison data with the lot record. Standard comparisons can miss a shift: one study of an immunoassay found that lot validation flagged no reagent lot as different, while reported patient results showed significant lot-to-lot changes (Algeciras-Schimnich et al., 2013).
Sample preparation supplies decide what reaches the instrument, and they expire like everything else. CLIA regulations state that reagents, calibration materials and other supplies must not be used when they have exceeded their expiration date, have deteriorated, or are of substandard quality.
Go through the bench before extraction starts:
Derivatization reagents deserve extra care. Many react with moisture, and a bottle that’s been opened repeatedly can lose strength before its printed date. Write the opening date on every bottle and follow the in-use limit in your procedure.
Don’t substitute a different brand of cartridge, vial or solvent grade because the usual one is on back order. Recoveries and background can shift, and the method was validated with specific materials.
Lot traceability lets you answer one question fast: which results were produced with this lot? If a calibrator, a reagent or a batch of liners is later found to be faulty, the records are how you find the affected samples.
Record the lot number of every consumable and reference material on the batch record before the run, not afterward. That covers the column serial number, the liner and septum lots, each calibrator and control, internal standard, reagents and solvents. If your laboratory information management system captures lots electronically, confirm the entries are complete before the run.
Quarantine new lots until they’re verified, and label them so nobody picks one up by mistake. Store them apart from the lots in use.
| Top Tip: Keep a one-page consumables sheet at the instrument, with a row for each item, its required specification from the method, the lot in use and the date it was installed or opened. Have the analyst initial it before every batch. During an inspection or an investigation, that single page answers most of the first questions anyone will ask. |
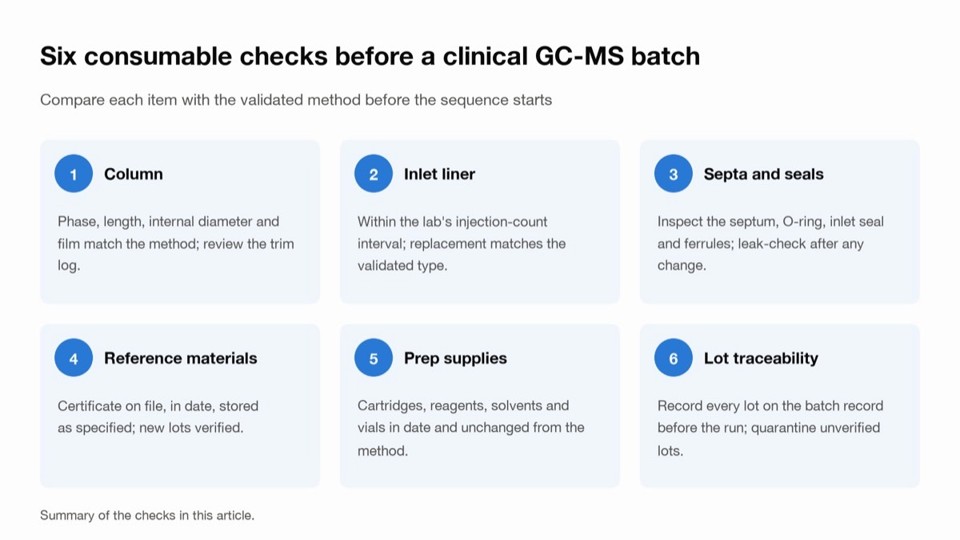
Print these six checks, add your method’s own limits beside each one and tape the page inside the instrument logbook. Start with tomorrow’s batch: read the column tag and the liner log before you load the first vial.
Change it at the interval your lab has set, counted in injections, and sooner for dirty matrices. If you’re close to the limit, change the liner before the batch, then run a solvent blank and a check standard before any patient sample.
Not as a straight swap, because the method was validated with specific materials. A different liner taper, wool position or cartridge brand can change the results, so treat it as a method change and follow your lab’s change control.
Lot numbers let you find which results were produced with a given lot if it’s later found to be faulty. Record every consumable and reference material on the batch record before the run, not afterward.


Brain MRI in Mental Health Care: When It’s Used and What It Can Show Most therapists will never order a brain scan. Scans have a way of turning up in the therapy room anyway. A client mentions their …
Posted Nov 12, 2026 Mental Health Medical Imaging
Connecting innovation decision makers to authoritative information, institutions, people and insights.

Medigy accurately delivers healthcare and technology information, news and insight from around the world.
Medigy surfaces the world's best crowdsourced health tech offerings with social interactions and peer reviews.
© 2026 Netspective Foundation, Inc. All Rights Reserved.
Built on Nov 12, 2026 at 6:05pm